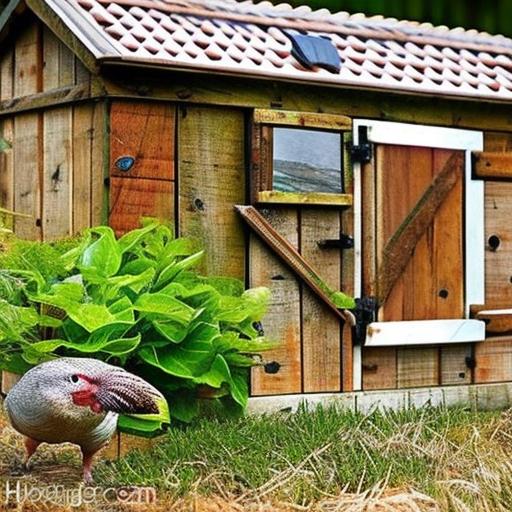
Chicken waterers are crucial components in poultry husbandry, providing a consistent supply of clean water to maintain flock health and hydration. These specialized devices are designed to meet the specific needs of chickens, ensuring constant access to water for optimal growth and well-being. Waterers are essential for flocks of all sizes, from small backyard coops to large-scale commercial operations.
Several types of chicken waterers are available in the market, including gravity-fed systems, automatic waterers, and traditional designs. Each type offers distinct advantages and potential drawbacks, making it important for poultry keepers to select the most appropriate option based on their flock size and specific requirements. This article will cover the following topics related to chicken waterers:
1.
Materials required for constructing a chicken waterer
2. Step-by-step instructions for building a waterer
3. Strategies for maintaining water levels in the waterer
4.
The significance of clean water for chicken health
5. Solutions to common problems encountered with chicken waterers
6. A summary of key points discussed in the article
Table of Contents
Key Takeaways
- Chicken waterers are essential for providing clean water to chickens
- Materials needed for making a chicken waterer include a bucket, poultry nipples, and a drill
- Steps for making a chicken waterer involve drilling holes in the bucket and attaching the poultry nipples
- Tips for keeping the waterer filled include checking it daily and cleaning it regularly
- Clean water is important for chickens to stay healthy and hydrated
Materials Needed for Making a Chicken Waterer
Container Selection
The first step is to choose a container to hold the water. This can be a plastic or metal bucket, a large plastic jug, or any other food-safe container that can hold enough water for your flock.
Additional Components
You’ll also need a waterer base or tray that allows the chickens to access the water without making a mess. Furthermore, you’ll require a waterer valve or nipple that dispenses water when the chickens peck at it. These valves can be purchased at most farm supply stores or online.
Tools and Accessories
Finally, you’ll need some basic tools such as a drill and drill bits, pliers, and possibly some sealant or Teflon tape to ensure that the waterer is leak-proof. Once you have gathered all of these materials, you’ll be ready to start assembling your chicken waterer.
Steps for Making a Chicken Waterer
The first step in making a chicken waterer is to prepare the container that will hold the water. If you are using a plastic jug or bucket, you may need to drill a hole near the bottom of the container to install the waterer valve or nipple. Once the hole is drilled, you can insert the valve or nipple and secure it in place using pliers.
If necessary, you can use sealant or Teflon tape to ensure that the connection is watertight. Next, you will need to attach the waterer base or tray to the container. This base should be large enough to accommodate all of your chickens at once and should be sturdy enough to withstand their pecking and scratching.
Once the base is attached, you can fill the container with clean, fresh water and test the waterer to make sure that it is working properly. If everything is functioning as it should, you can place the chicken waterer in your coop or run and watch as your flock enjoys their new source of hydration.
Tips for Keeping the Waterer Filled
Keeping your chicken waterer filled is essential for ensuring that your flock has access to clean water at all times. One way to make this task easier is to invest in a larger capacity waterer that holds enough water to last several days. This will reduce the frequency with which you need to refill the waterer and will give you peace of mind knowing that your chickens always have access to hydration.
Additionally, you can set up a regular schedule for checking and refilling the waterer, such as first thing in the morning and again in the evening. This will help you stay on top of keeping the waterer filled and will prevent any lapses in hydration for your flock. Finally, consider installing multiple waterers in different areas of your coop or run to ensure that all of your chickens have easy access to water, especially if you have a large flock.
Another tip for keeping your chicken waterer filled is to monitor the weather and adjust your refill schedule accordingly. During hot weather, chickens will drink more water to stay cool and hydrated, so you may need to refill the waterer more frequently. Conversely, during colder weather, chickens may drink less water, so you can adjust your refill schedule accordingly.
By staying attentive to your flock’s hydration needs and making adjustments as necessary, you can ensure that your chickens always have access to clean, fresh water.
Importance of Clean Water for Chickens
Clean water is essential for the health and well-being of chickens. Just like humans, chickens rely on water for hydration, digestion, temperature regulation, and overall health. Providing clean water to your flock is crucial for preventing dehydration, heat stress, and other health issues that can arise from inadequate hydration.
In addition to providing clean water, it’s important to regularly clean and maintain your chicken waterers to prevent bacterial growth and contamination. Dirty or contaminated water can lead to illness and disease in your flock, so it’s important to keep their water source clean and free from debris. In addition to providing clean water for hydration, chickens also use water for grooming and dust bathing.
Clean water helps keep their feathers clean and free from parasites, which is essential for their overall health and comfort. By providing a constant supply of clean water, you are ensuring that your flock has everything they need to thrive and stay healthy.
Troubleshooting Common Issues with Chicken Waterers

Leaks and Drips
One common problem with chicken waterers is leaks or drips from the waterer valve or nipple. This can be caused by a faulty connection or worn-out parts. To troubleshoot this issue, check the connection between the valve or nipple and the container and make sure it is secure and watertight. If necessary, replace any worn-out parts or reseal the connection with sealant or Teflon tape.
Algae Growth
Another common issue with chicken waterers is algae growth in the water container. Algae can quickly multiply in warm, sunny conditions and can make the water unappealing to your chickens. To prevent algae growth, place the waterer in a shaded area or cover it with a dark material to block out sunlight. Additionally, regularly clean and scrub the container with a mild bleach solution to remove any algae buildup.
Freezing Temperatures
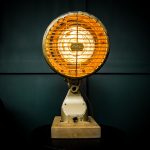
Finally, freezing temperatures can cause the water in your chicken waterer to freeze, leaving your flock without access to hydration. To prevent this issue, consider investing in heated chicken waterers that are designed to keep the water from freezing in cold weather. Alternatively, you can use heated bases or insulation to protect your existing waterers from freezing temperatures.
Conclusion and Recap
In conclusion, chicken waterers are essential for keeping your flock hydrated and healthy. By providing a constant supply of clean water, you are ensuring that your chickens have everything they need to thrive and stay healthy. When making a chicken waterer, gather materials such as a container, waterer base or tray, waterer valve or nipple, and basic tools like a drill and pliers.
Follow the steps for making a chicken waterer by preparing the container, attaching the base or tray, and testing the functionality of the waterer. Keep the waterer filled by investing in larger capacity containers, setting up a regular refill schedule, monitoring weather conditions, and installing multiple waterers if necessary. Clean water is crucial for chickens’ hydration, digestion, grooming, and overall health.
Regularly clean and maintain your chicken waterers to prevent bacterial growth and contamination that can lead to illness in your flock. Troubleshoot common issues with chicken waterers such as leaks or drips from valves or nipples, algae growth in containers, and freezing temperatures by checking connections, preventing algae growth with shade and regular cleaning, and investing in heated chicken waterers or insulation for cold weather. In summary, providing clean water for your chickens is essential for their well-being and should be a top priority for any poultry owner.
By following these tips and guidelines for making and maintaining chicken waterers, you can ensure that your flock has access to clean, fresh water at all times.
If you’re looking for tips on how to keep your chickens happy and healthy, you might want to check out this article on chicken coop portage. It offers valuable information on how to create a comfortable and functional living space for your feathered friends. And while you’re at it, you might also want to learn about when guinea fowl lay eggs to expand your knowledge on poultry care.
FAQs
What is a waterer for chickens?
A waterer for chickens is a device used to provide a constant supply of water to chickens. It is essential for keeping chickens hydrated and healthy.
Why is it important to keep a waterer filled for chickens?
Chickens need access to clean, fresh water at all times to stay healthy and maintain proper bodily functions. Dehydration can lead to serious health issues and even death in chickens.
What are the benefits of making a waterer to keep filled for chickens?
Making a waterer to keep filled for chickens ensures that they always have access to water, even when you are not available to refill it regularly. This can help prevent dehydration and keep the chickens healthy.
How can I make a waterer to keep filled for chickens?
There are various DIY methods for making a waterer to keep filled for chickens, including using a large container with a water dispenser or creating a gravity-fed system using PVC pipes and fittings. It’s important to ensure that the waterer is easy to clean and refill.
What are some tips for maintaining a waterer for chickens?
Regularly clean the waterer to prevent the buildup of algae, bacteria, and other contaminants. Check the waterer daily to ensure it is functioning properly and refill it as needed. Additionally, protect the waterer from extreme weather conditions to prevent freezing or overheating.
Meet Walter, the feathered-friend fanatic of Florida! Nestled in the sunshine state, Walter struts through life with his feathered companions, clucking his way to happiness. With a coop that’s fancier than a five-star hotel, he’s the Don Juan of the chicken world. When he’s not teaching his hens to do the cha-cha, you’ll find him in a heated debate with his prized rooster, Sir Clucks-a-Lot. Walter’s poultry passion is no yolk; he’s the sunny-side-up guy you never knew you needed in your flock of friends!
Related posts:
 Keeping Chickens Cozy in Winter: Essential Tips for Keeping Your Flock Warm and Happy
 Discover the Secrets to Successfully Keeping Chickens Near Your Home
 Combatting Mites Without Dust Baths: Creative Solutions for Keeping Your Chickens Healthy
 Keep Your Chickens Happy and Laying Eggs Throughout Winter: Tips and Tricks