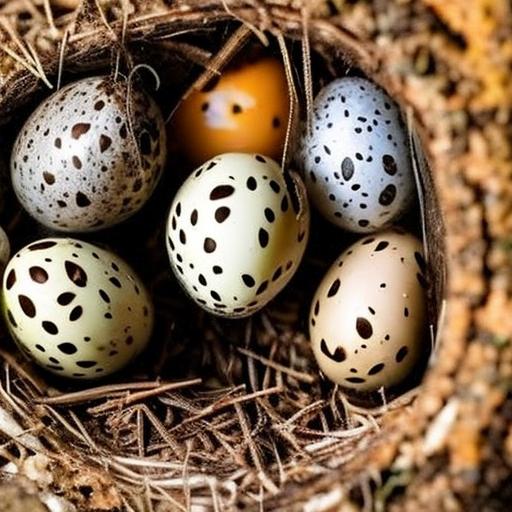
When it comes to hatching eggs, selecting the right ones is crucial for a successful outcome. It’s important to choose eggs that are fresh and fertile. Fresh eggs have a higher chance of hatching successfully, so it’s best to use eggs that are no more than 7 days old. Fertile eggs are also essential for hatching, so make sure to source your eggs from a reliable supplier or from your own flock of healthy, breeding chickens.
Another factor to consider when selecting eggs for hatching is the size and shape. Look for eggs that are of uniform size and shape, as this will ensure even heating and better chances of successful hatching. Avoid using eggs with cracks or abnormalities, as these can affect the development of the embryo and reduce the chances of a successful hatch. By carefully selecting the right eggs, you can set yourself up for a successful hatching process and increase the chances of healthy chicks being born.
When it comes to selecting the right eggs for hatching, it’s important to consider the breed of the chickens. Different breeds have different hatching characteristics, so it’s important to choose eggs from a breed that is known for good fertility and hatchability. Additionally, consider the age of the hens laying the eggs, as older hens may produce eggs with lower fertility rates. By taking these factors into consideration, you can ensure that you are selecting the best possible eggs for hatching and increase the chances of a successful outcome.
Key Takeaways
- Select eggs from healthy hens for best hatching results
- Store eggs in a cool, humid environment to maintain freshness
- Turn eggs at least 3 times a day to prevent the yolk from sticking to the shell
- Maintain proper humidity levels to prevent the eggs from drying out or becoming too moist
- Keep the incubator at a consistent temperature for successful hatching
- Use a candling light to monitor the development of the embryos
- Regularly monitor the hatching process for any signs of distress or complications
Proper Storage Conditions
Once you have selected the right eggs for hatching, it’s important to store them properly to maintain their viability. Proper storage conditions are crucial for ensuring that the embryos develop properly and have the best chance of hatching successfully. The ideal storage conditions for hatching eggs include maintaining a consistent temperature and humidity level. Store the eggs in a cool, dry place with a temperature of around 55-60 degrees Fahrenheit. Avoid storing the eggs in areas with extreme temperature fluctuations or high humidity, as this can negatively impact the development of the embryos.
It’s also important to store the eggs with the pointed end facing downwards, as this helps to keep the air cell in the correct position and prevents the embryo from sticking to the shell membrane. Additionally, it’s best to store the eggs in an egg carton or an egg storage tray to prevent them from rolling around and getting damaged. By following these proper storage conditions, you can ensure that the eggs remain viable and have the best chance of hatching successfully.
In addition to temperature and humidity control, it’s important to regularly turn the eggs during storage to prevent the embryo from sticking to the shell membrane. Gently turning the eggs at least three times a day will help to ensure that the embryo develops properly and has the best chance of hatching successfully. By following these proper storage conditions, you can set yourself up for a successful hatching process and increase the chances of healthy chicks being born.
Turning the Eggs
Turning the eggs is an essential part of the incubation process and is crucial for ensuring that the embryos develop properly. Turning the eggs helps to prevent the embryo from sticking to the shell membrane and promotes even development. It’s important to turn the eggs at least three times a day during the incubation period, making sure to turn them gently to avoid damaging the developing embryos.
Turning the eggs also helps to ensure that the embryos receive an equal amount of heat and oxygen, which is essential for their development. Without regular turning, the embryos may become stuck to one side of the egg, leading to developmental issues and reduced chances of successful hatching. By diligently turning the eggs throughout the incubation period, you can help to ensure that the embryos develop properly and have the best chance of hatching successfully.
In addition to promoting proper development, turning the eggs also helps to prevent deformities in the chicks that may result from uneven development. By ensuring that the embryos receive consistent heat and oxygen from all sides, you can reduce the risk of deformities and increase the chances of healthy chicks being born. By understanding the importance of turning the eggs during the incubation process, you can take proactive steps to promote proper development and increase the chances of a successful hatch.
Humidity Control
Maintaining proper humidity levels is crucial for a successful hatching process. The ideal humidity level for hatching eggs is around 45-55% during the first 18 days of incubation, and then increasing to 65-75% during the final days before hatching. Proper humidity levels are essential for ensuring that the embryos develop properly and have the best chance of hatching successfully.
Low humidity levels can result in excessive moisture loss from the eggs, leading to dehydration of the embryos and reduced chances of successful hatching. On the other hand, high humidity levels can lead to excessive moisture retention in the eggs, which can suffocate the embryos and also reduce chances of successful hatching. By carefully monitoring and controlling humidity levels throughout the incubation period, you can ensure that the embryos develop properly and have the best chance of hatching successfully.
In addition to maintaining proper humidity levels, it’s important to provide adequate ventilation in the incubator to prevent excessive moisture buildup. Proper ventilation helps to ensure that fresh air circulates around the eggs, preventing mold growth and promoting healthy embryo development. By understanding the importance of humidity control in the hatching process, you can take proactive steps to maintain optimal conditions and increase the chances of a successful hatch.
Temperature Control
Maintaining proper temperature levels is essential for a successful hatching process. The ideal temperature for hatching eggs is around 99-100 degrees Fahrenheit throughout most of the incubation period, with a slight increase to 100-101 degrees Fahrenheit during the final days before hatching. Proper temperature control is crucial for ensuring that the embryos develop properly and have the best chance of hatching successfully.
Low temperatures can slow down embryo development and reduce chances of successful hatching, while high temperatures can lead to overheating and also reduce chances of successful hatching. It’s important to regularly monitor and adjust temperature levels in the incubator to maintain optimal conditions for embryo development. By carefully controlling temperature levels throughout the incubation period, you can ensure that the embryos have the best chance of hatching successfully.
In addition to maintaining proper temperature levels, it’s important to provide adequate heat distribution in the incubator to ensure that all eggs receive consistent warmth. Uneven heat distribution can lead to uneven embryo development and reduced chances of successful hatching. By understanding the importance of temperature control in the hatching process, you can take proactive steps to maintain optimal conditions and increase the chances of a successful hatch.
Candling the Eggs
Candling is a process used to check the development of embryos inside hatching eggs. It involves shining a bright light through each egg to observe its contents. Candling is typically done around day 7-10 of incubation to check for signs of fertility and embryo development. It’s important to remove any infertile or non-developing eggs at this stage to prevent them from affecting other healthy embryos.
Candling can also be done again around day 18-19 to check for signs of pipping (cracking) in preparation for hatching. This allows you to monitor which eggs are close to hatching and make any necessary adjustments in preparation for their arrival. By regularly candling your eggs throughout the incubation period, you can ensure that you are able to identify any issues early on and increase your chances of a successful hatch.
In addition to checking for signs of fertility and embryo development, candling also allows you to monitor any potential issues such as malpositions or deformities in developing embryos. By identifying these issues early on, you can take proactive steps to address them and increase your chances of healthy chicks being born. By understanding the importance of candling in the hatching process, you can take proactive steps to monitor embryo development and increase your chances of a successful hatch.
Monitoring the Hatching Process
As your eggs approach their expected hatch date, it’s important to closely monitor the hatching process to ensure everything goes smoothly. Keep an eye on humidity levels in particular during this time, as increasing humidity slightly can help soften eggshells and make it easier for chicks to hatch. It’s also important to resist any temptation to assist chicks in hatching unless absolutely necessary, as interfering with their natural process can do more harm than good.
Once chicks start hatching, it’s important to leave them in the incubator until they are fully dry and fluffy before moving them into a brooder. This allows them time to fully absorb their yolk sacs, which provides essential nutrients for their first few days of life outside of their shells. By closely monitoring and allowing chicks time to fully hatch on their own terms, you can increase their chances of being healthy and thriving once they enter their new environment.
In addition to monitoring chicks as they hatch, it’s important to keep an eye on any remaining unhatched eggs after most chicks have emerged. Some chicks may take longer than others to hatch, so it’s important not to give up on unhatched eggs too soon. By providing them with additional time and monitoring their progress closely, you may still have a chance at successfully hatching additional chicks from these remaining eggs. By understanding how to monitor and assist with the hatching process when necessary, you can increase your chances of a successful hatch and ensure that all chicks have a healthy start in life.
In conclusion, successfully hatching chicks from eggs requires careful attention to detail throughout every stage of incubation. From selecting fresh, fertile eggs to monitoring humidity levels and turning eggs regularly, each step plays a crucial role in ensuring healthy chick development. By understanding these key factors and taking proactive steps throughout each stage of incubation, you can increase your chances of a successful hatch and enjoy watching your new flock grow and thrive.
If you’re interested in learning more about caring for young poultry, you might also want to check out this insightful article on how to care for goslings. It provides valuable tips and guidance on raising and nurturing young geese, which can be a helpful resource for anyone looking to expand their knowledge of poultry care.
FAQs
What are quail eggs?
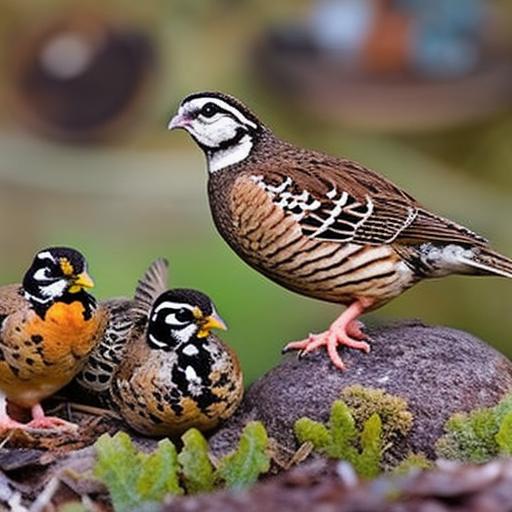
Quail eggs are the eggs laid by various species of quail, which are small ground-nesting birds. They are smaller than chicken eggs and have a spotted pattern on their shells.
How long can quail eggs be stored before hatching?
Quail eggs can be stored for up to 7-10 days before they start to lose viability for hatching. It is best to incubate them as soon as possible for the highest hatch rate.
What is the best way to store quail eggs for hatching?
Quail eggs should be stored in a cool, humid environment with the pointed end facing downwards. They can be stored in an egg carton or an egg storage container with a damp paper towel to maintain humidity.
What temperature and humidity levels are ideal for storing quail eggs?
Quail eggs should be stored at a temperature of around 55-60°F (13-16°C) and a humidity level of 60-70%. This helps to prevent the eggs from drying out and losing viability.
How can I tell if a quail egg is still viable for hatching?
To check if a quail egg is still viable, you can perform a process called “candling.” This involves shining a bright light through the egg to see if the embryo is developing. If the egg appears clear or has a blood ring, it is not viable and should be discarded.
Can quail eggs be stored in the refrigerator for hatching?
It is not recommended to store quail eggs in the refrigerator for hatching, as the temperature and humidity levels are not ideal for maintaining egg viability. It is best to store them at room temperature in a cool, humid environment.
Meet Walter, the feathered-friend fanatic of Florida! Nestled in the sunshine state, Walter struts through life with his feathered companions, clucking his way to happiness. With a coop that’s fancier than a five-star hotel, he’s the Don Juan of the chicken world. When he’s not teaching his hens to do the cha-cha, you’ll find him in a heated debate with his prized rooster, Sir Clucks-a-Lot. Walter’s poultry passion is no yolk; he’s the sunny-side-up guy you never knew you needed in your flock of friends!

