
Watching a hen industriously heat her eggs, you can’t help but be drawn into the quiet drama of nature at work. That rhythmic clucking might as well be a soothing countdown to one of life’s most charming moments—the emergence of fluffy chicks from their shells.
As someone who has eagerly paced alongside many chicken-keepers, I understand the mix of eagerness and impatience that comes with anticipating the peep-peep-peeping in your coop.
From hands-on experience and countless hours poring over poultry texts, I’ve learned that those little lives generally take 21 days before making an entrance. But fret not; this article isn’t about leaving you to watch the calendar days disappear one by one.
Instead, we’ll walk through an A-to-Z primer on everything from picking your feathered friends’ breeds to ensuring your nurturing hens have all they need for their vital role—all so when hatch day arrives, it unfolds with joyous pecks and cheeps.
So tuck into this guide and let’s embark on this egg-citing journey together!
How Long Does it Take for Chicken Eggs to Hatch Naturally?
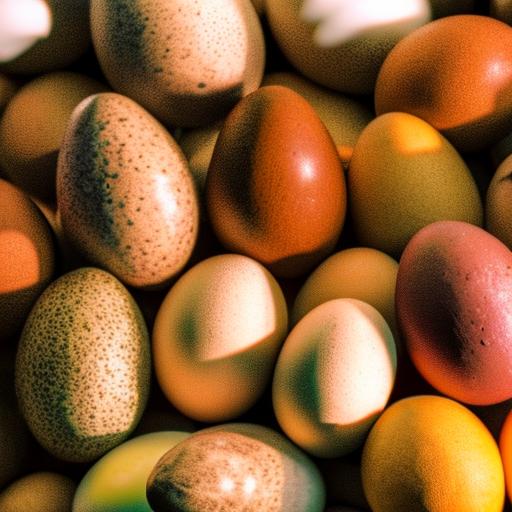
The natural incubation process for chicken eggs typically takes 21 days from the time the eggs are laid to when they hatch. This period can vary slightly depending on environmental factors such as temperature and humidity.
Understanding the natural incubation process
I have a cozy flock of chickens in my backyard, and I love watching the natural egg hatching process. It all starts with a broody hen ready to sit tight for about three weeks. She’s got an internal clock that tells her when to lay her clutch and then pause her egglaying to incubate them.
This dedicated mama turns each egg once a day for the first 18 days. It’s like she knows just how to keep those little ones inside developing perfectly.
During this time, it’s crucial to let the hen do her thing but also keep an eye on her. A broody hen might take short breaks which is fine unless it gets really hot out there! Those eggs need her warmth, so if she stays away too long in sweltering weather, I gently nudge her back towards the nest.
Now that we’ve looked at what goes into natural egg incubation, let me share tips on preparing for this exciting event!
How to Prepare for Natural Egg Hatching
Preparing for natural egg hatching involves selecting suitable chicken breeds, setting up a nesting pen, and sourcing fertilized eggs. To learn more about the essential steps to prepare for natural egg hatching, keep reading!
Choosing the right chicken breeds
Selecting the right chicken breed is crucial for successful natural egg hatching. Look for broody breeds like Silkie or Orpington as they are more inclined to sit on eggs for the full period of incubation.
These breeds have a strong instinct for broodiness and nurturing, making them ideal choices for natural egg hatching. On the other hand, if you opt for non-broody varieties such as Leghorns or Hamburgs, you might find it challenging to get them to stay on the nest long enough.
Consider breeds known for their maternal instincts such as Cochins and Brahmas, which are reliable in sitting on eggs until they hatch. Also, research your chosen breed’s typical behavior around brooding and egg-sitting tendencies before committing to natural hatching.
Setting up a nesting pen
After selecting the right chicken breeds for natural egg hatching, setting up a nesting pen is crucial for creating an optimal environment for your broody hen. Here’s how to prepare:
- Choose a quiet and secluded location for the nesting pen to provide privacy and security for the broody hen and her eggs.
- Use clean, dry straw or wood shavings to create a comfortable nest inside a wooden or plastic box with low sides to prevent eggs from rolling out.
- Ensure the nesting area is well – ventilated and protected from drafts, extreme temperatures, and predators.
- Provide easy access to food and water near the nesting pen to minimize the hen’s need to leave the nest frequently.
- Regularly check and clean the nesting materials to maintain a hygienic environment for hatching eggs.
- Place dummy eggs or golf balls in the nest before introducing fertilized eggs to help the broody hen recognize her designated laying spot.
- Monitor the behavior of other chickens to prevent them from disturbing the broody hen in her nesting area.
Sourcing fertilized eggs
When setting up a nesting pen, I start looking for fertilized eggs from reputable breeders or hatcheries. It’s crucial to ensure the eggs are fresh and have been stored properly to increase the chances of successful hatching.
I consider the specific chicken breeds suitable for my environment and purpose, as different breeds have varying broodiness levels and egg production rates. Once I’ve identified potential sources, I carefully inspect the eggs for cracks or damage, as these can reduce the likelihood of successful incubation.
Additionally, it’s essential to handle the eggs with care during transportation to avoid any impacts that could harm the developing embryos inside.
Caring for a Broody Hen
When a hen shows signs of broodiness, such as staying in the nest box all day and exhibiting protective behavior over her eggs, it’s important to move her to a nesting pen where she can safely hatch her eggs.
Monitoring the nest and providing proper care for the broody hen is essential for successful natural egg hatching.
Signs of broodiness
A broody hen will exhibit the following signs:
- Spending extended periods on the nest, refusing to leave.
- Plucking feathers from her breast area to create a bare patch for better contact with the eggs.
- Emitting growling or clucking sounds when approached, showing protectiveness over the eggs.
- Sitting low in the nest, effectively covering and warming the eggs.
- Displaying puffed up feathers and a fixed, determined demeanor while on the nest.
Moving a hen to a nesting pen
I start by gently lifting the broody hen from her current nesting spot. Then, I carefully place her in the prepared nesting pen ensuring it’s comfortable and secure.
- Ensure that the nesting pen is in a quiet, safe, and secluded area to provide privacy for the broody hen.
- Provide fresh bedding such as straw or wood shavings to make the nesting pen cozy for the hen.
- Place food and water within easy reach of the hen so she can tend to her needs without leaving the nest.
- Allow the broody hen some time to settle into her new surroundings before checking on her periodically to ensure she’s comfortable and content.
- Keep an eye out for any signs of distress or discomfort in the hen, and make adjustments to the nesting pen as needed.
Monitoring the nest and caring for the hen
- Check the nest daily to ensure the eggs are being properly cared for and are at the right temperature.
- Gently lift the broody hen off the nest every day to give her a chance to eat, drink, and relieve herself.
- Look out for signs of distress or illness in the hen, and address any issues promptly.
- Ensure that the nesting area is clean and free from any potential hazards that could harm the eggs or the hen.
- Provide fresh food and water close to the nesting area to make it easier for the broody hen to take care of her needs without straying too far.
Hatching and Caring for Chicks
After 21 days of incubation, the chicks will begin to hatch. It’s important to keep an eye on the nesting pen and be prepared to care for the new arrivals once they hatch.
Hatching process and signs of a successful hatch
When incubating chicken eggs naturally, the hatching process typically takes around three weeks. Backyard breeds may require a few extra days for hatching. Here are the essential steps and signs to watch for during the hatching process:
- Egg Candling: After 7-10 days of incubation, candle the eggs to check for signs of life such as blood vessels and movement.
- Peeping Sounds: Listen for peeping sounds from within the eggs, which indicate that chicks are actively pipping and preparing to hatch.
- Pipping: Watch for small cracks appearing on the eggshells, signaling that the chicks have begun breaking through.
- Chick Movement: Observe slight movements in the eggs as chicks become more active and ready to hatch.
- Egg Shells Breaking: As the chicks start to break free from their shells, you may notice pieces of eggshell scattered in the nesting area.
Post-hatch management and caring for new chicks
After the chicks have hatched, remember to provide them with a warm and dry brooding area. Use a heat lamp to maintain a temperature of 95 degrees Fahrenheit for the first week, then decrease by 5 degrees each week until they are fully feathered.
Conclusion: Tips for Successfully Hatching Chicken Eggs Naturally
In conclusion, hatching chicken eggs naturally takes around three weeks, with backyard breeds requiring a few more days. The practical tips provided in this article ensure efficient preparation for natural egg hatching.
By understanding broody hen care and the incubation period, readers can significantly improve their success in hatching chicks. Take action now to create a nurturing environment for your broody hen and experience the joy of successfully hatching chicken eggs naturally! Explore further resources or services to enhance your knowledge on this subject.
FAQs
1. How long is the natural hatching duration for chicken eggs?
Chicken eggs usually take about 21 days to hatch naturally when a broody hen sits on them to keep them warm.
2. What is the egg incubation time for chickens if I don’t use an incubator?
Even without an incubator, the incubation period for chicken eggs remains around 21 days, as long as they are under proper care of a broody hen.
3. Can I check on the chick development in eggs during the hatching process?
Yes! By candling eggs, you can shine a light through the shell to observe chick development and ensure they’re growing right.
4. Are there signs that chicks are starting to hatch from their eggs?
You might hear peeping sounds or see tiny cracks forming on eggshells – these are clear signs of hatching chicks.
5. How should I care for broody hens while they’re sitting on eggs?
Make sure your broody hens have easy access to food and water nearby and check them often so they remain healthy during the hen sitting on eggs period.
Meet Walter, the feathered-friend fanatic of Florida! Nestled in the sunshine state, Walter struts through life with his feathered companions, clucking his way to happiness. With a coop that’s fancier than a five-star hotel, he’s the Don Juan of the chicken world. When he’s not teaching his hens to do the cha-cha, you’ll find him in a heated debate with his prized rooster, Sir Clucks-a-Lot. Walter’s poultry passion is no yolk; he’s the sunny-side-up guy you never knew you needed in your flock of friends!
Related posts:
 When is Duck Mating Season? A Comprehensive Guide to Understanding the Reproductive Habits of Ducks
 When Do Guinea Fowl Lay Eggs? A Comprehensive Guide to Guinea Hen Egg Laying Patterns
 Can Guinea Fowl and Chickens Live Together: A Guide to Coexistence
 How Many Eggs Do Geese Lay? Understanding Geese Egg Production and Clutch Sizes