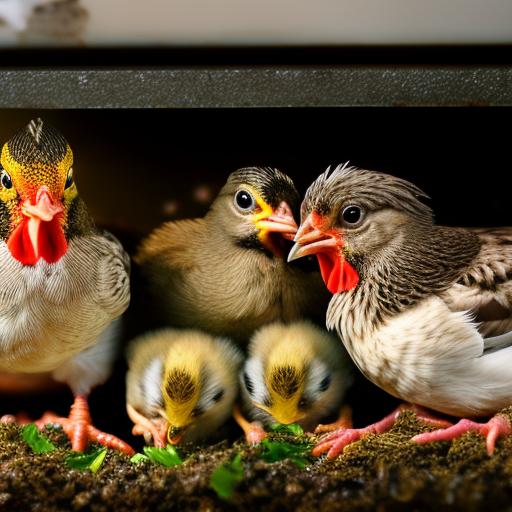
Incubating chickens is the process of artificially hatching eggs in a controlled environment. This method is commonly used by poultry farmers and hobbyists to ensure a successful hatch and increase the chances of healthy chicks. Incubation provides a controlled environment where temperature, humidity, and egg turning can be carefully monitored and adjusted to create optimal conditions for embryo development.
The importance of incubating eggs cannot be overstated. It allows for the development of chicks in a controlled environment, reducing the risk of disease transmission and predation that can occur when eggs are left to hatch naturally. Incubation also increases the chances of a successful hatch, as it eliminates the possibility of eggs being abandoned or damaged by the mother hen. By providing the ideal conditions for embryo development, incubation ensures that chicks have the best start in life.
Key Takeaways
- Knowing when to remove hatchlings from the incubator is crucial for their health and development.
- Factors such as temperature, humidity, and egg turning can affect hatchling development.
- The ideal incubation period varies for different chicken breeds and should be carefully monitored.
- Monitoring hatchling progress through candling and egg weight loss can help determine when they are ready to be removed.
- Risks of leaving hatchlings in the incubator for too long include dehydration, suffocation, and reduced immunity.
Importance of Knowing When to Remove Hatchlings from the Incubator
Knowing when to remove hatchlings from the incubator is crucial for their health and well-being. Leaving hatchlings in the incubator for too long can have serious consequences. As the chicks continue to develop, they consume the remaining yolk sac, which provides them with essential nutrients and energy. If they are left in the incubator for too long, they may run out of nutrients and become weak or even die.
Several factors should be considered when deciding when to remove hatchlings from the incubator. The most important factor is the development stage of the chicks. Each breed has a specific incubation period, and it is essential to know this information to determine when they are ready to be removed. Additionally, monitoring temperature and humidity levels in the incubator is crucial, as fluctuations can affect chick development. Lastly, observing the behavior and physical signs of readiness in the chicks can also help determine when they are ready to be removed.
Factors Affecting Hatchling Development
Several factors can affect the development of hatchlings during the incubation process. These factors include temperature and humidity levels in the incubator, egg turning frequency, and the quality of the eggs themselves.
Temperature and humidity levels play a crucial role in embryo development. The ideal temperature for incubating chicken eggs is around 99.5 degrees Fahrenheit (37.5 degrees Celsius). Deviations from this temperature can result in delayed or abnormal development. Similarly, humidity levels should be maintained at around 50-55% for the first 18 days of incubation and then increased to 65-75% for the final days before hatching. Proper temperature and humidity levels ensure that the embryos receive the necessary conditions for growth and development.
Egg turning is another critical factor in hatchling development. Eggs should be turned at least three times a day during the incubation period. This helps prevent the embryo from sticking to the inner shell membrane and promotes even distribution of nutrients within the egg. Turning also helps prevent deformities and ensures proper development of the chick.
The quality of the eggs also plays a significant role in hatchling development. Eggs with cracks or deformities may not develop properly or may not hatch at all. It is essential to carefully inspect eggs before placing them in the incubator and discard any that are damaged or have irregularities.
The Ideal Incubation Period for Different Chicken Breeds
| Chicken Breed | Ideal Incubation Period (in days) |
|---|---|
| Australorp | 21 |
| Barnevelder | 21 |
| Brahma | 21 |
| Buff Orpington | 21 |
| Leghorn | 21 |
| Marans | 21 |
| Plymouth Rock | 21 |
| Rhode Island Red | 21 |
| Sussex | 21 |
| Wyandotte | 21 |
Different chicken breeds have different incubation periods, which can range from 19 to 23 days. It is crucial to know the ideal incubation period for each breed to ensure successful hatching.
Some common chicken breeds and their ideal incubation periods include:
1. Rhode Island Red: 21 days
2. Leghorn: 21 days
3. Plymouth Rock: 21 days
4. Sussex: 21 days
5. Orpington: 21 days
6. Silkie: 21 days
7. Wyandotte: 21 days
8. Brahma: 21 days
9. Australorp: 21 days
10. Easter Egger: 21 days
It is important to note that these are general guidelines, and individual variations may occur. Monitoring the development of the embryos and observing physical signs of readiness can help determine when the chicks are ready to be removed from the incubator.
Monitoring Hatchling Progress in the Incubator
Monitoring the progress of hatchlings in the incubator is crucial for ensuring their health and well-being. Regular monitoring allows for early detection of any issues or abnormalities that may arise during the incubation process.
One of the most important signs of healthy development is the presence of a visible air cell. As the embryo develops, it consumes oxygen and produces carbon dioxide, which causes the air cell to grow larger. A visible air cell indicates that the embryo is developing properly and has enough oxygen to sustain itself.
Another sign of healthy development is movement within the egg. As the chick grows, it will start to move and position itself for hatching. This movement can be observed by gently tapping or rotating the egg and observing any response from the chick.
Additionally, candling can be used to monitor the development of embryos. Candling involves shining a bright light through the egg to observe the internal structures. This technique allows for visual confirmation of embryo development and can help identify any abnormalities or issues that may need attention.
Signs that Hatchlings are Ready to be Removed from the Incubator

There are several physical and behavioral signs that indicate hatchlings are ready to be removed from the incubator.
Physically, chicks should have fully absorbed their yolk sac before being removed from the incubator. The yolk sac provides essential nutrients and energy for the first few days after hatching, so it is crucial that it is fully absorbed before removing them.
Behaviorally, chicks will start to make peeping sounds and move around inside the egg shortly before hatching. They may also start to chip away at the shell or make small cracks. These signs indicate that they are ready to hatch and should be closely monitored for progress.
It is important not to rush the hatching process. Chicks need time to fully absorb their yolk sac and strengthen their muscles before attempting to break free from the shell. Prematurely removing them from the incubator can result in weak or underdeveloped chicks.
Risks of Leaving Hatchlings in the Incubator for Too Long
Leaving hatchlings in the incubator for too long can have serious consequences for their health and well-being. The most significant risks include dehydration and suffocation.
As hatchlings continue to develop, they consume the remaining yolk sac, which provides them with essential nutrients and energy. If they are left in the incubator for too long, they may run out of nutrients and become weak or even die. It is crucial to remove them from the incubator once they have fully absorbed their yolk sac to ensure they have enough energy to thrive.
Leaving hatchlings in the incubator for an extended period can also increase the risk of suffocation. As chicks hatch, they produce carbon dioxide, which can accumulate in the incubator if not properly ventilated. High levels of carbon dioxide can be harmful to the chicks and may lead to suffocation. Removing them from the incubator once they are ready helps prevent this risk.
Tips for Safely Removing Hatchlings from the Incubator
Safely removing hatchlings from the incubator requires careful preparation and attention to detail. Here are some tips to ensure a safe and successful removal process:
1. Prepare a clean and warm brooder area: Before removing the hatchlings, make sure you have a clean and warm brooder area ready for them. The brooder should be equipped with a heat source, such as a heat lamp or heating pad, to maintain the appropriate temperature for the chicks.
2. Gather necessary supplies: Gather all the necessary supplies, including a clean towel or paper towels, a small container of warm water, and a pair of clean scissors or nail clippers. These supplies will be used to assist with the removal process if needed.
3. Observe the hatchlings: Before removing the hatchlings, observe their behavior and physical signs of readiness. Look for signs of movement, peeping sounds, and cracks in the shell. This will help ensure that they are fully developed and ready to be removed.
4. Assist with hatching if necessary: If a chick is struggling to hatch or has made minimal progress after several hours, it may need assistance. Gently moisten the shell with warm water and carefully remove small pieces of shell to create an opening for the chick to emerge. Be extremely careful not to damage the chick or its blood vessels during this process.
5. Handle with care: When removing the hatchlings from the incubator, handle them with care to avoid causing any harm or stress. Use a gentle touch and support their bodies to prevent any injuries.
6. Place in the brooder: Once removed from the incubator, place the hatchlings in the prepared brooder area. Make sure they have access to food and water and monitor their behavior closely for any signs of distress or illness.
Post-Incubation Care for Newly Hatched Chicks
Providing proper care for newly hatched chicks is crucial for their health and well-being. Here are some tips for post-incubation care:
1. Maintain appropriate temperature: Chicks require a warm environment to thrive. The brooder temperature should be around 95 degrees Fahrenheit (35 degrees Celsius) for the first week and gradually decreased by 5 degrees each week until reaching room temperature. Use a thermometer to monitor the temperature and adjust the heat source as needed.
2. Provide clean water and food: Chicks should have access to clean water and chick starter feed from the moment they hatch. Make sure the water is easily accessible and shallow enough for them to drink without drowning. The feed should be specifically formulated for chicks and provide the necessary nutrients for growth and development.
3. Monitor behavior and health: Observe the behavior and health of the chicks closely during the first few days. Look for signs of distress, such as lethargy, loss of appetite, or abnormal droppings. If any issues arise, consult a veterinarian for guidance.
4. Gradually introduce them to the outdoors: After a few weeks, gradually introduce the chicks to the outdoors. Start by allowing them short supervised visits outside and gradually increase the duration as they grow older. This will help them acclimate to their future environment and develop their natural instincts.
Ensuring the Health and Well-being of Your Chickens from the Start
Proper incubation and care are essential for ensuring the health and well-being of your chickens from the start. By understanding the incubation process, monitoring hatchling progress, and providing appropriate post-incubation care, you can increase the chances of a successful hatch and raise healthy chicks.
Knowing when to remove hatchlings from the incubator is crucial to prevent dehydration and suffocation. Factors such as temperature, humidity levels, egg turning frequency, and egg quality can affect hatchling development. Different chicken breeds have different ideal incubation periods, so it is important to know the specific requirements for each breed.
Monitoring hatchling progress in the incubator allows for early detection of any issues or abnormalities that may arise. Signs of readiness include a visible air cell, movement within the egg, peeping sounds, and cracks in the shell. Removing hatchlings from the incubator at the right time helps prevent risks such as dehydration and suffocation.
Safely removing hatchlings from the incubator requires careful preparation and handling. Providing proper post-incubation care, including maintaining appropriate temperature, providing clean water and food, and monitoring behavior and health, is crucial for the well-being of newly hatched chicks.
By following these guidelines and ensuring proper incubation and care, you can give your chickens the best start in life and set them up for a healthy and productive future.
If you’re wondering how long to keep chickens in an incubator after hatching, you’ll find all the answers in this informative article from Poultry Wizard. It’s important to provide the right environment for your newly hatched chicks, and understanding the ideal duration in the incubator is crucial for their health and development. To learn more about this topic, click here.
FAQs
What is an incubator?
An incubator is a device used to artificially hatch eggs by providing the necessary conditions such as temperature, humidity, and ventilation.
How long does it take for a chicken to hatch in an incubator?
It takes approximately 21 days for a chicken to hatch in an incubator.
What should be the temperature and humidity in an incubator for hatching chickens?
The temperature in an incubator for hatching chickens should be maintained at 99.5°F (37.5°C) and the humidity should be around 50-55% for the first 18 days and then increased to 65-75% for the last 3 days.
How long should you keep the chicks in the incubator after hatching?
You should keep the chicks in the incubator for at least 24 hours after hatching to allow them to dry off and fluff up.
What should you do after the chicks have hatched in the incubator?
After the chicks have hatched in the incubator, you should move them to a brooder box with a heat lamp, food, and water.
Can you leave the chicks in the incubator for longer than 24 hours after hatching?
It is not recommended to leave the chicks in the incubator for longer than 24 hours after hatching as they need to be moved to a brooder box with proper heat, food, and water.
What happens if you leave the chicks in the incubator for too long after hatching?
If you leave the chicks in the incubator for too long after hatching, they may become weak and dehydrated as they need food and water to survive. They may also start to peck at each other or the eggshells, which can cause injury or death.
Meet Walter, the feathered-friend fanatic of Florida! Nestled in the sunshine state, Walter struts through life with his feathered companions, clucking his way to happiness. With a coop that’s fancier than a five-star hotel, he’s the Don Juan of the chicken world. When he’s not teaching his hens to do the cha-cha, you’ll find him in a heated debate with his prized rooster, Sir Clucks-a-Lot. Walter’s poultry passion is no yolk; he’s the sunny-side-up guy you never knew you needed in your flock of friends!


